Gásadalur: Photographing the Faroe Islands’ Most Iconic Village
*Disclaimer: This blog is reader-supported, and this page might therefore contain affiliate links. When you book or buy through them, I may earn a small commission at no extra cost to you. It helps with these in-depth and original guides, so thank you for the support! Also, as an Amazon Associate, I earn from qualifying purchases. Full Disclosure
It’s pretty much impossible to do any research about the Faroe Islands without seeing *that* photo of Gásadalur, its two nearby mountains, and the Múlafossur—the waterfall that sometimes flows upwards. Despite its popularity, I was so keen to visit Gásadalur after booking my first trip to the Faroe Islands. It looked just as beautiful in real life, so much so that I made it a priority when I revisited the archipelago a year later.

-ARTICLE CONTINUES BELOW-
Get My Faroe Islands Travel Guides Delivered to Your Inbox
Save time on researching and get all my Faroe Islands travel guides delivered straight to your email inbox.
Despite being one of the best spots on the Faroe Islands, capturing good pictures can be challenging. The light is ever-changing, and sometimes, it can be quite harsh. And since this is the Faroes we’re talking about, the weather won’t necessarily play fair.
Gásadalur is one of those places that you need to see with your own two eyes to believe it even exists. On my second trip here, I spent a few hours truly taking in this place and marveling at the scenery—while also looking for some interesting angles. This part-photo essay and part-photography guide will inspire you and also help you capture some unique shots.
Getting Here Now Is Much Easier Than Before…
Reaching Gásadalur now is pretty straightforward; you just have to go through a tunnel and down a (very beautiful) winding road to reach the village. However, getting here used to be much more difficult.
Until the tunnel was constructed in 2004, you had two options to reach Gásadalur. The first was to take a boat to the harbor here. However, you could only do so on calm days. This is the Faroe Islands, and stormy weather seems to love the archipelago just as much as I do, so you can quickly see the logistical problem here.

The second option was to hike. Prior to the tunnel’s construction, the local postman would have had to hike to reach the village. If someone died, their coffin would also have to be transported to Bøur—the closest village—over the mountain.
You can still do the hike (known as The Postman’s Trail) today, but it is challenging and steep in some areas. There are also some loose rocks, and it can be slippery. So, I don’t recommend doing the hike unless you’re an experienced hiker, are in good physical condition, and have the appropriate hiking equipment (including good shoes). If you’d feel more comfortable hiking with a local, you can take a guided tour.
How to Reach Gásadalur From Tórshavn
Gásadalur is very easy to reach from Tórshavn. You’ll first need to cross through the Vágar Tunnel, which costs 100 DKK. The toll covers both the outward and return journey.
As you approach Gásadalur, you’ll need to pass through the tunnel here as well. Unlike the tunnel connecting Streymoy and Vágar, this tunnel is free of charge. However, you should keep in mind that it is a single-lane tunnel; there are pull-over spots if you need to let passing traffic. You need to keep your headlights on when passing through this tunnel and every other one on the Faroe Islands.
Once you pass through the tunnel, you’ll drive along a winding road into the village. Gásadalur has parking spots when you arrive, and it should be easy to put your car there while you explore. I’ve only been in the off-season, though, so consider visiting at off-peak times if you’re here in the summer, as it’s one of the most popular spots on the Faroe Islands.
The journey from Tórshavn to Gásadalur takes around an hour.
You can also drive from Vágar Airport—the only airport on the Faroe Islands. If you do, the journey takes just under 20 minutes.
If you’re visiting the Faroe Islands without a car, you can take the Route 300 bus from Tórshavn. The schedule is available here. Alternatively, you can take a guided tour; I’ve taken this one before, for example, which stops in Gásadalur along with numerous other spots on the Faroe Islands.
Capturing *the* Postcard Shot
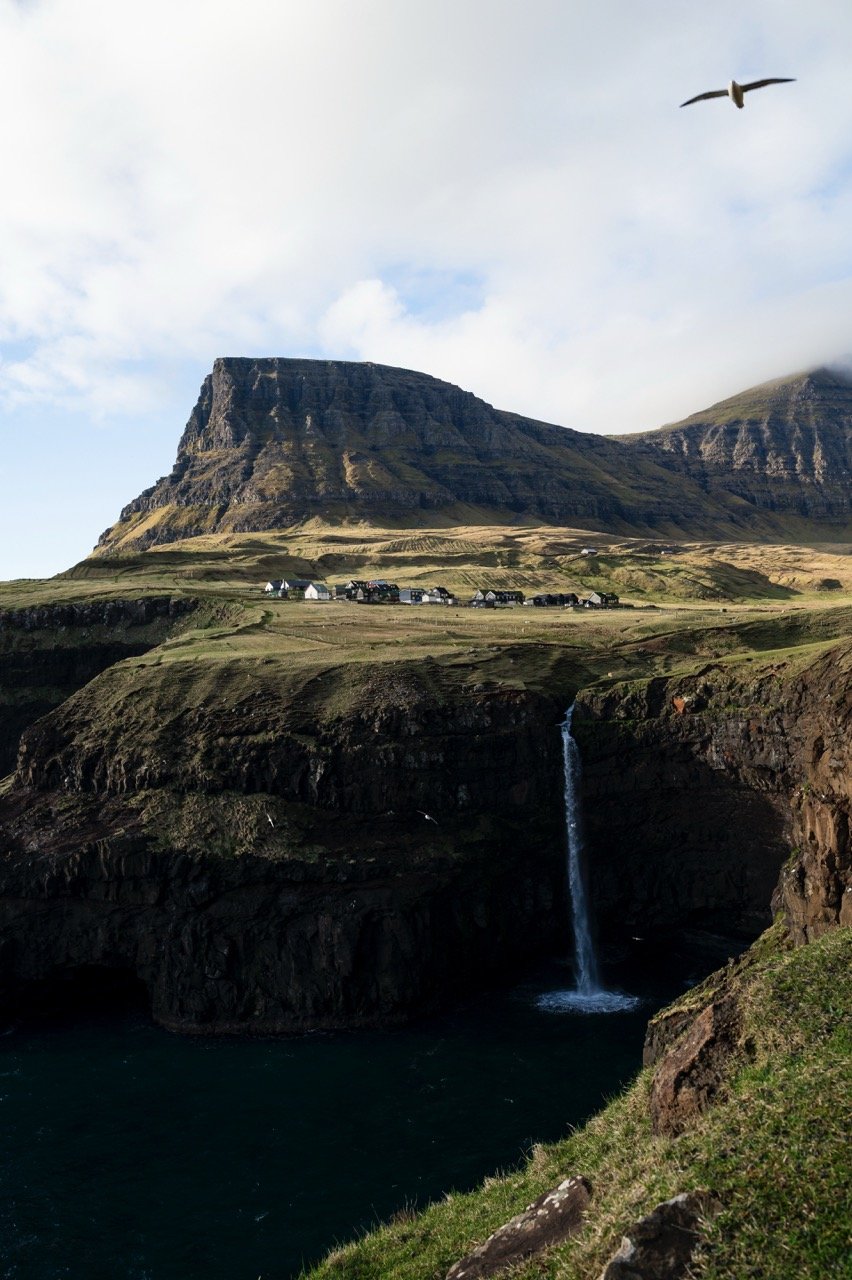
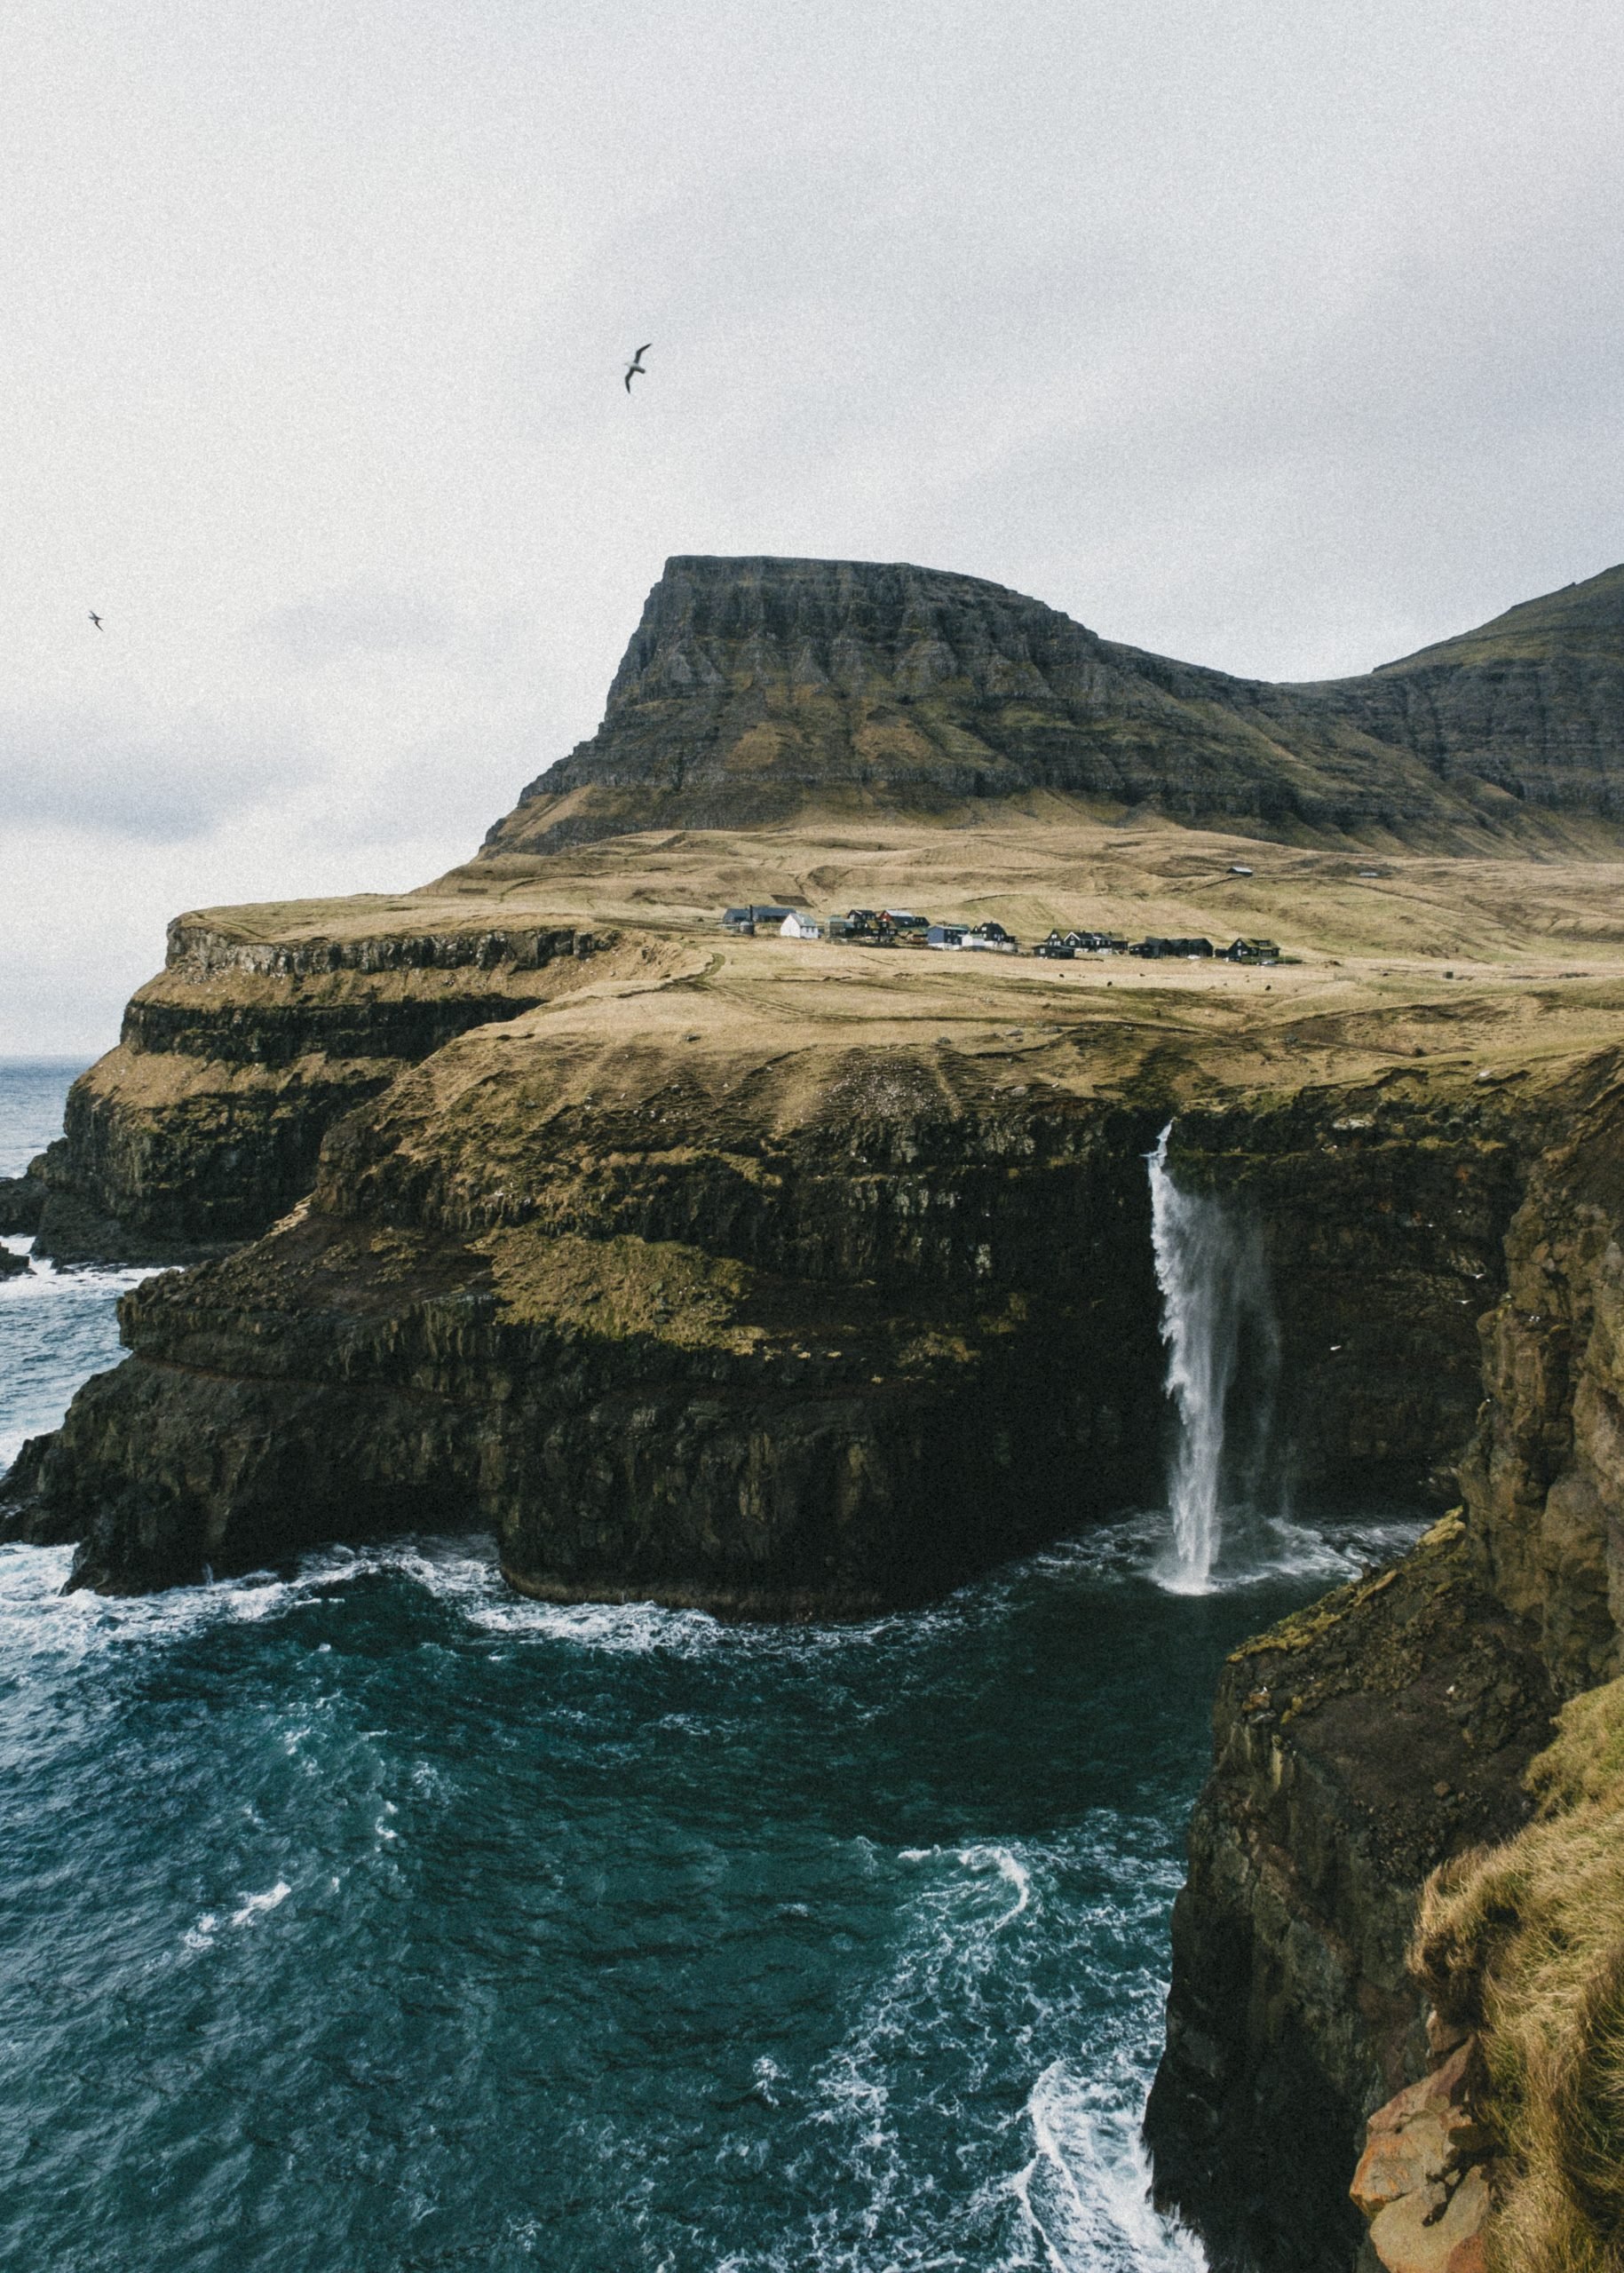
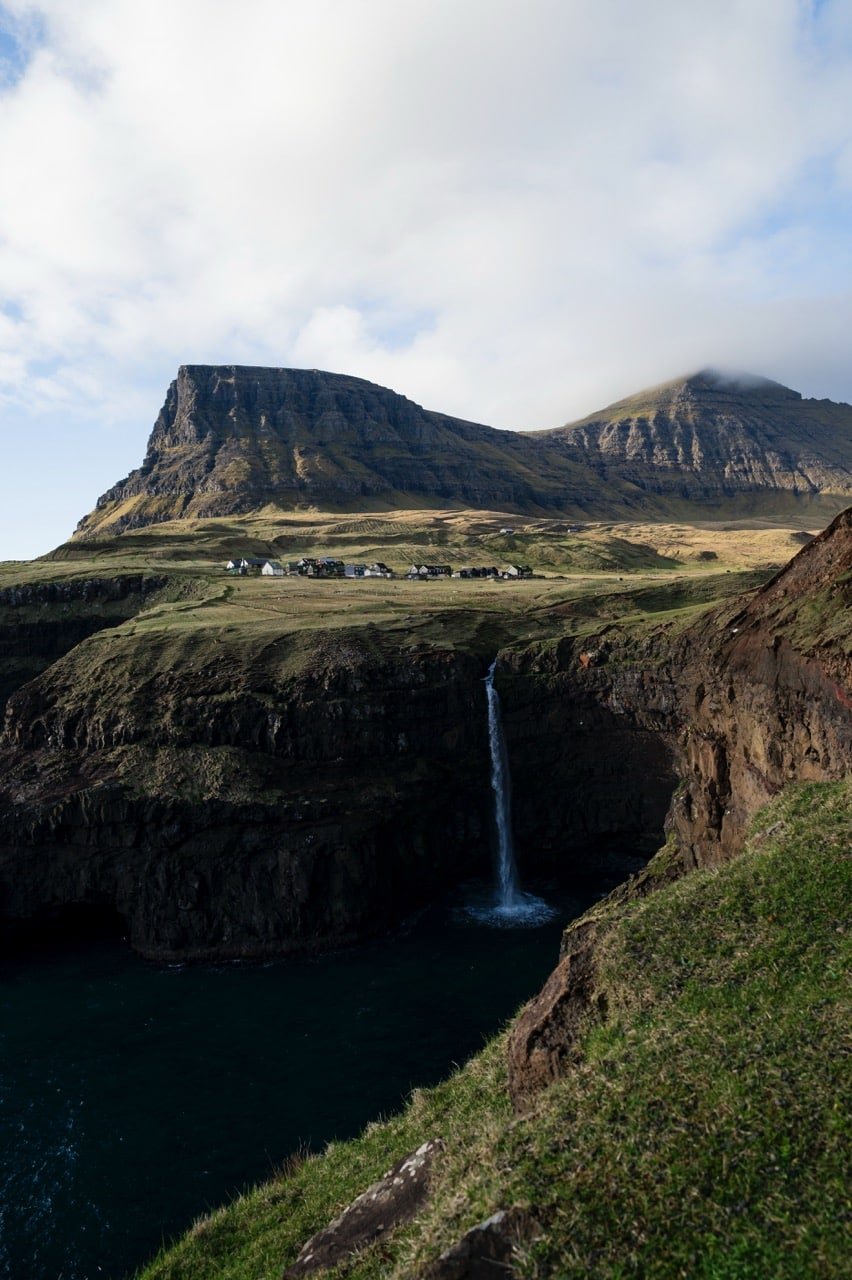
Let’s be real… that famous postcard shot of Gásadalur is famous for a very good reason. The backdrop featuring Árnafjall and Eysturtindur, with Múlafossur flowing into the North Atlantic Ocean, is stunning. When I first visited the spot, I audibly said “wow” because I was so taken aback.
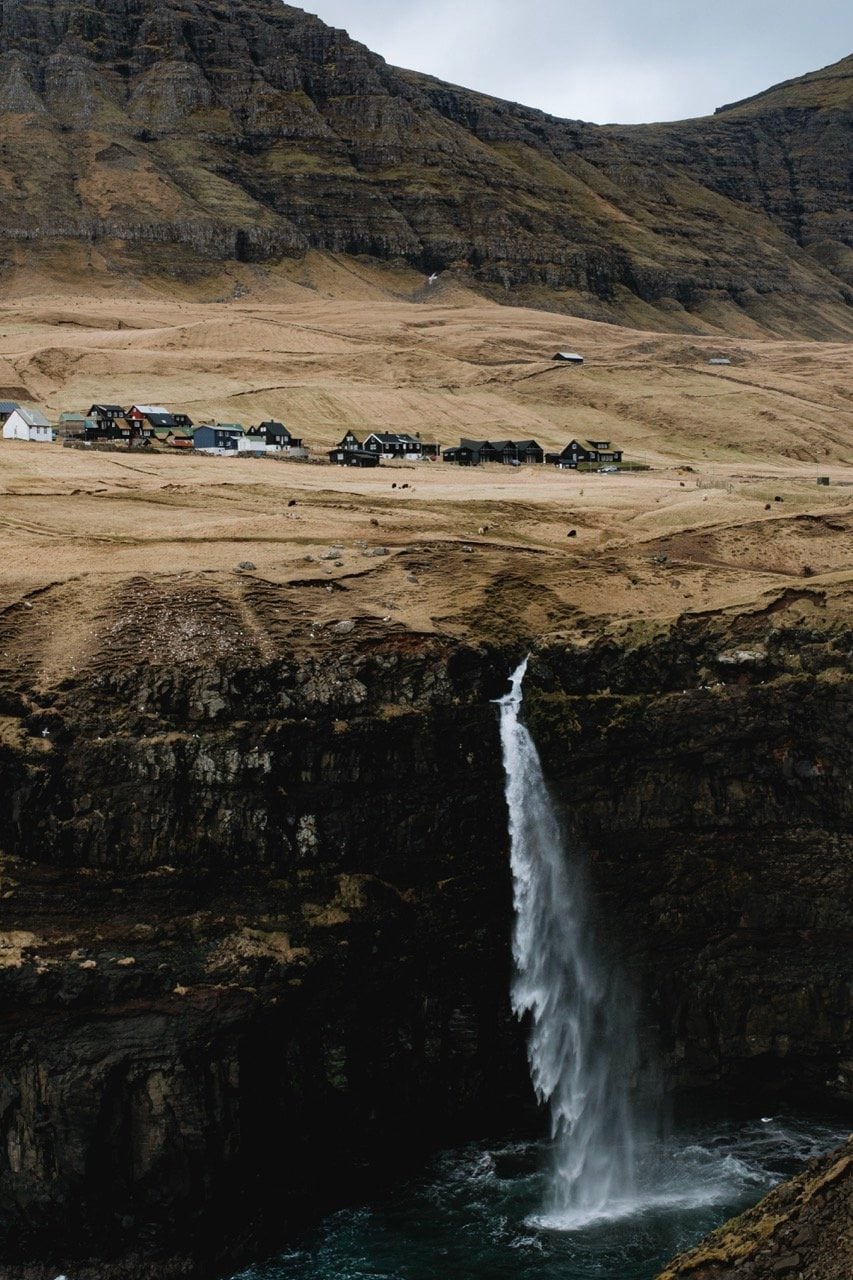
While I also wanted to capture some unique angles of the village and its nearby scenery (more about that later), I *had* to capture the postcard shot of Gásadalur. The first time I was here, the sea was quite aggressive, which added a nice extra layer to my pictures. Below was my favorite (which, as a side note, you can also buy as a print).
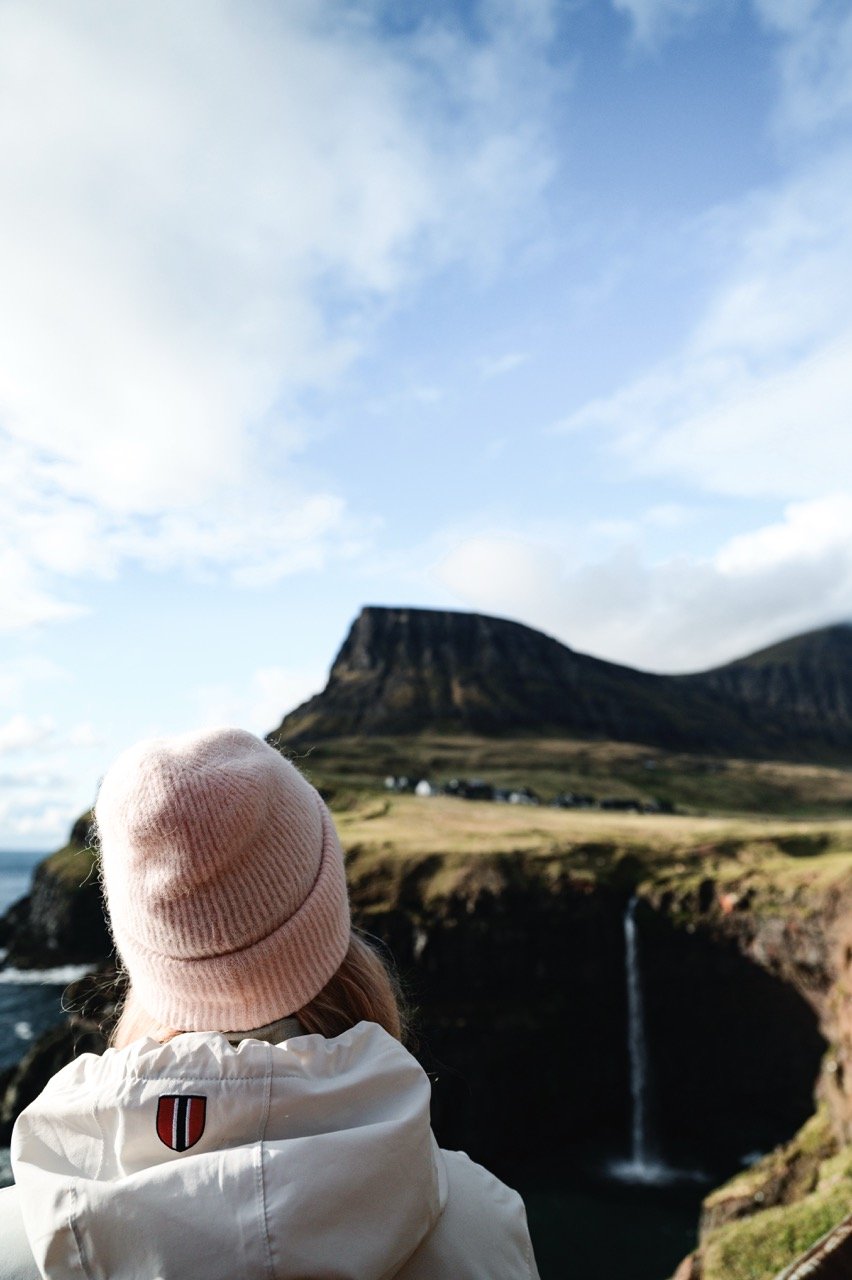
When I came back, the weather was much calmer. I don’t really like taking photos in sunny weather, to be honest, but we visited quite late in the day (and we were there in the off-season). So, the light was softer than it otherwise would have been. The clouds rolling over the mountains were my main point of interest, along with the various birds flying around.
Finding Unique Angles of Múlafossur and the Mountains
In addition to capturing the standard postcard shot, I wanted to spend some time trying to capture more unique angles. I’ve very rarely seen other images online that do so, and since I like thinking outside the box, it only made sense to take my time.
To be honest, one of the easiest ways I found to capture more unique pictures of Árnafjall was by simply zooming in on my lens. I traveled with a 16-80mm lens for my Fujifilm camera on my first trip to the Faroes, for example, and captured the shot you see below with it. I used a narrower aperture because I wanted to really showcase the textures in the mountain.
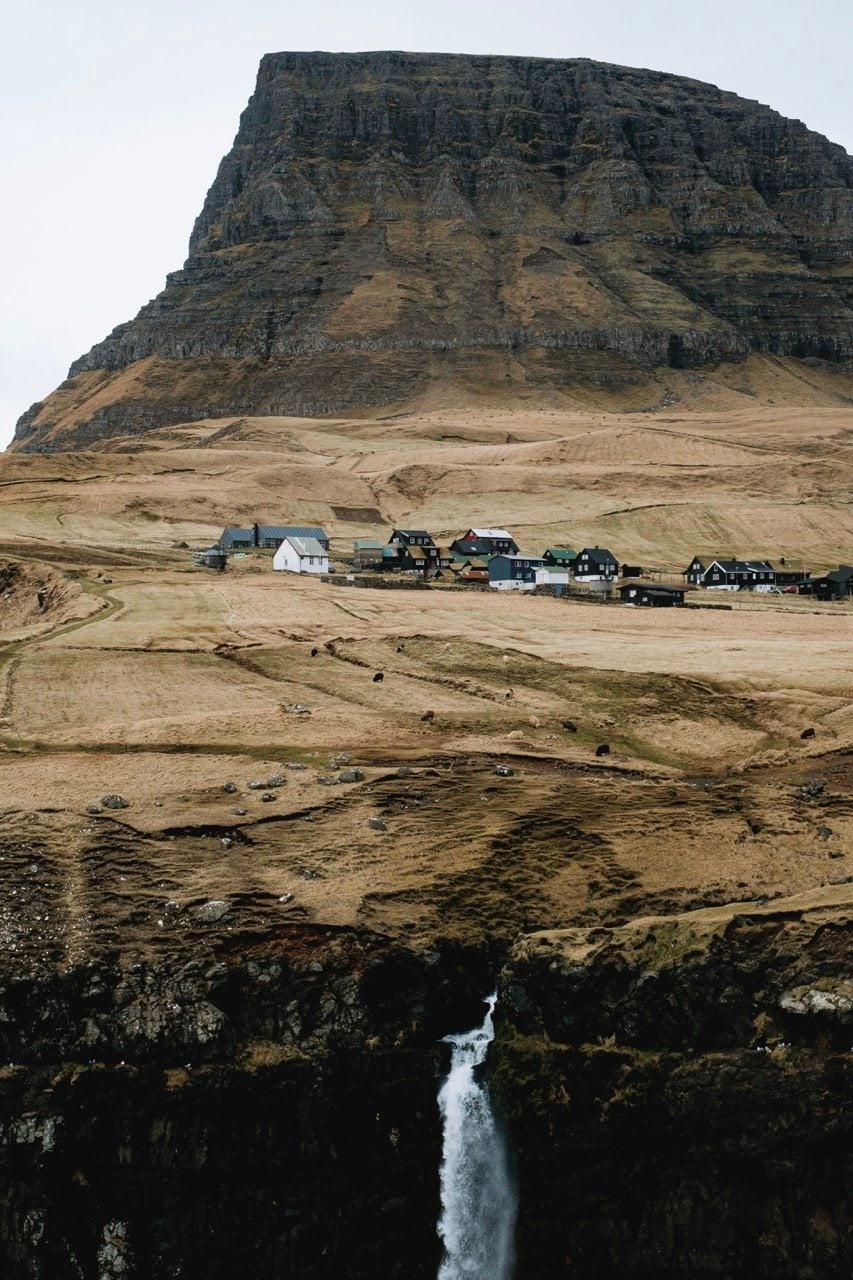
On my second trip to the Faroe Islands a year later, I went with a new camera and lens. This time, my kit was the Nikon Z6 II (of which I wrote a review about here) and the NIKKOR 24-70mm f/2.8 S lens. Since I had a full-frame camera now, cropping without losing detail was much easier. I love the composition of Múlafossur and the village below, for example.

Since most pictures of Gásadalur include Árnafjall, I also wanted to focus more on Eysturtindur instead. On my second trip to the village, I took this one; I love the clouds rolling over the mountain in particular. To capture it, I crouched down a little to get more of the cliff in front of me—which I think added to the composition. However, it’s very important that you DO NOT go beyond the barrier; I stayed within the designated area at all times because. Dropping into the North Atlantic Ocean probably wouldn’t be too fun.

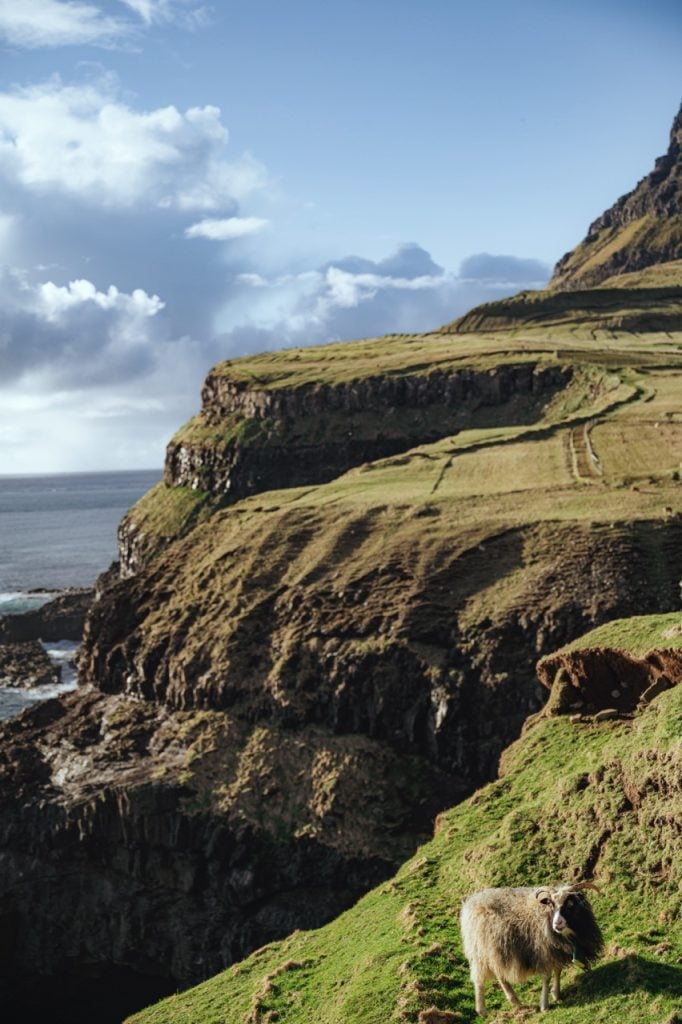
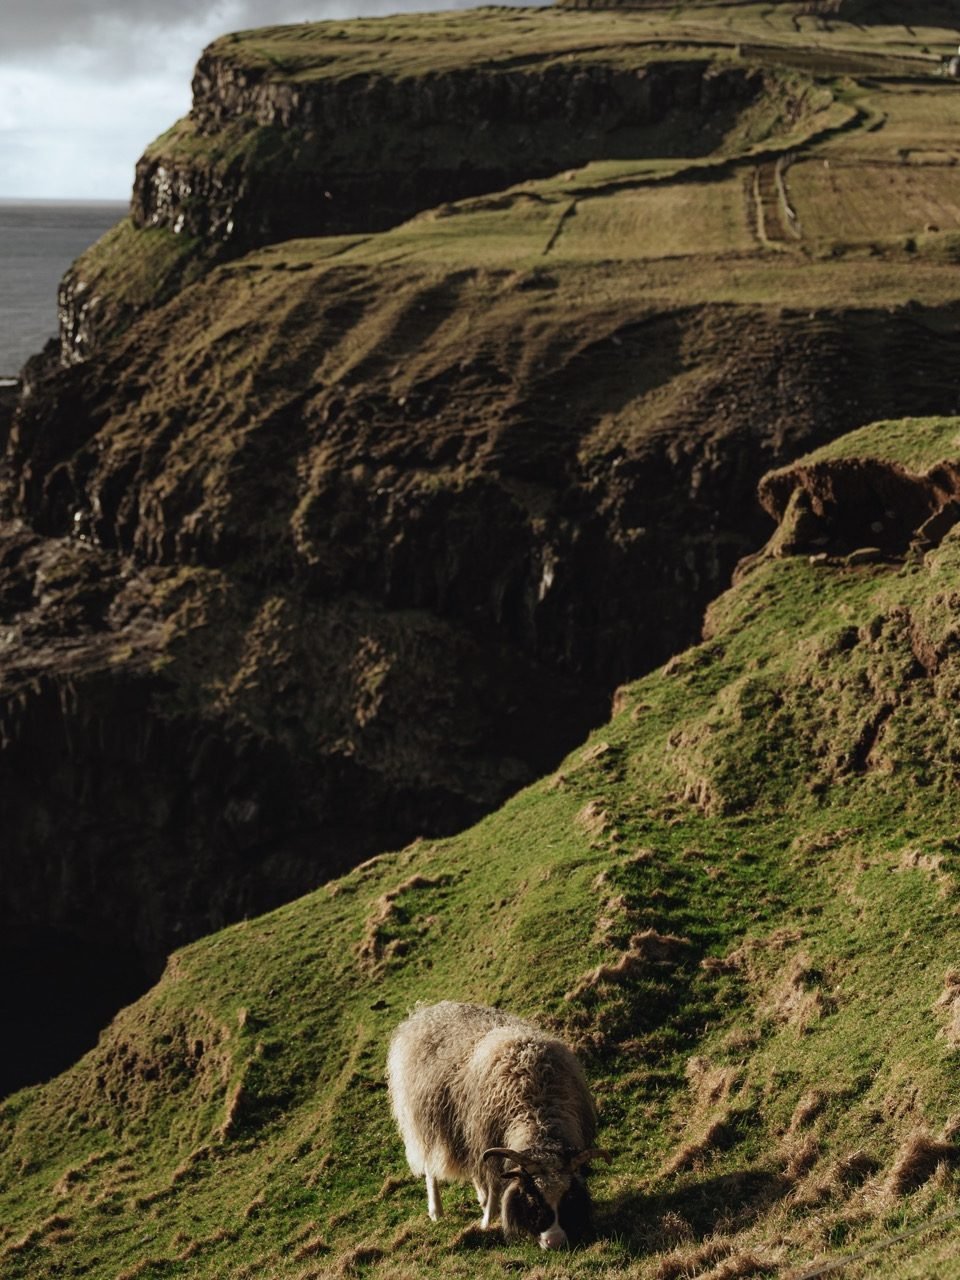
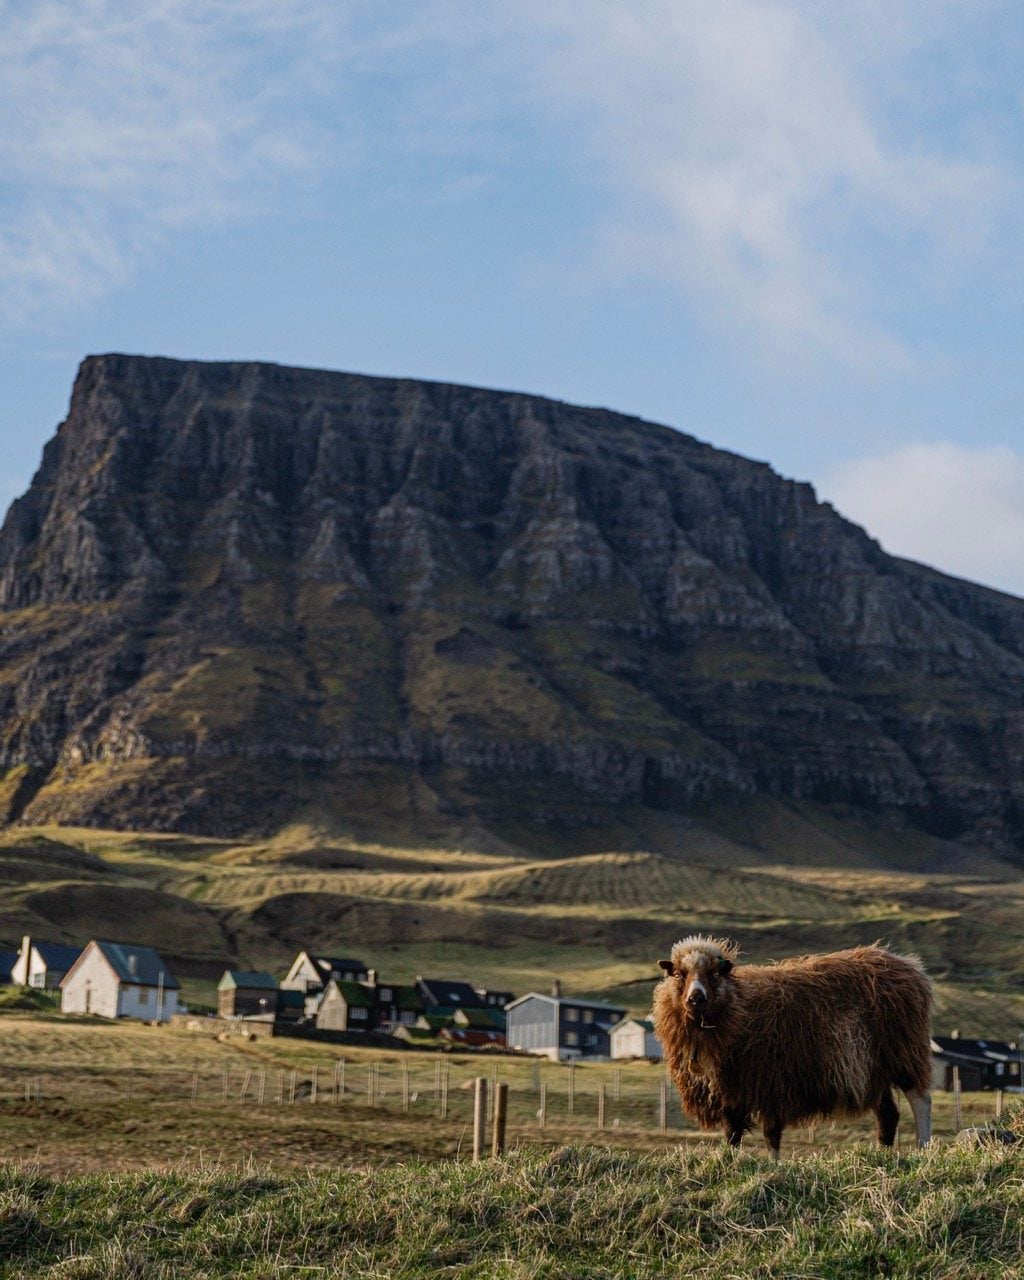
When in Doubt, Use Sheep in Your Photos
Like everywhere else in the Faroe Islands, you’ll find plenty of sheep in and around Gásadalur. On my second trip, we saw a couple of brave ones eating grass on the edge of the cliff.
As we wandered into the village, there were plenty more sheep, too. They make for great models, and it was nice to test out the wider aperture on my lens.

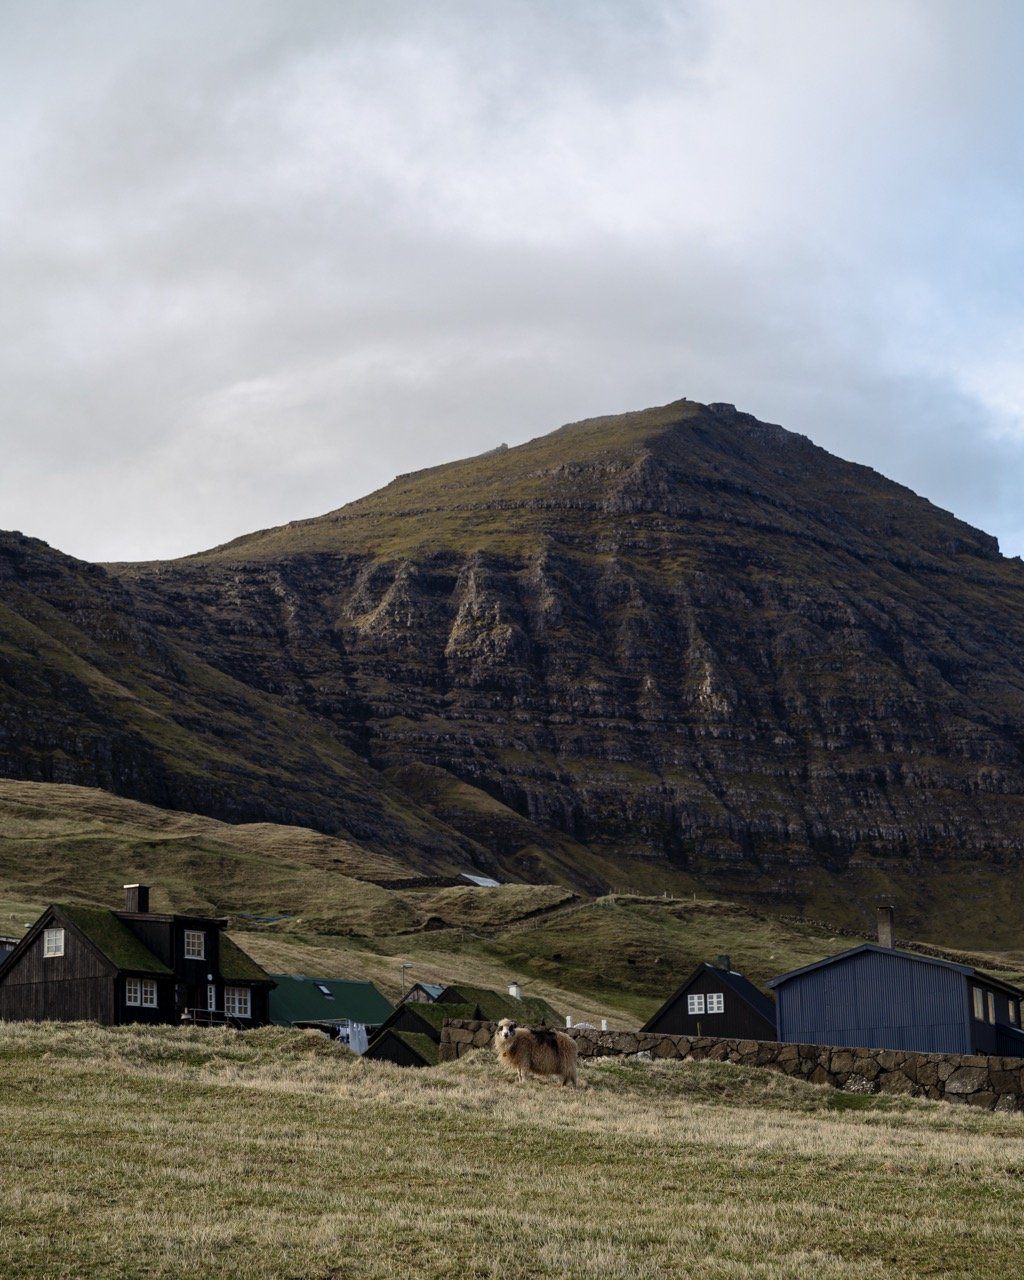
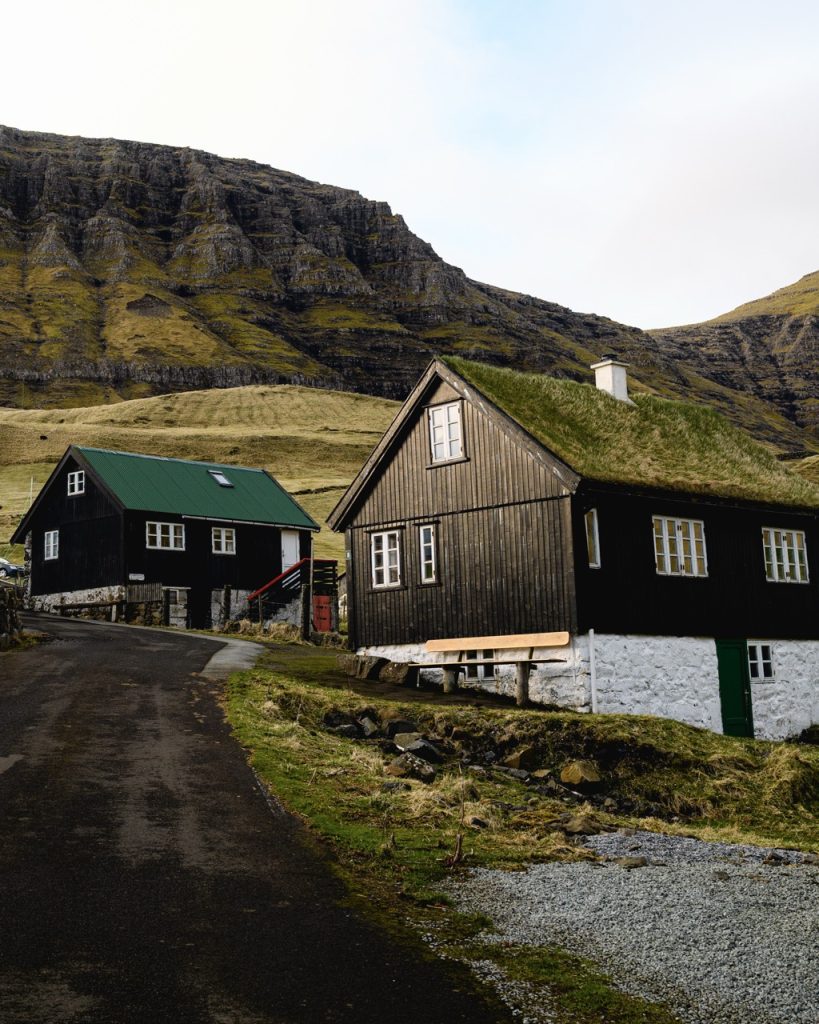
Wandering Around Gásadalur
Fewer than 25 people live in Gásadalur, so there isn’t anything “to do” in the traditional sense there. Still, it’s worth walking around—especially since you need to get back to your car anyway.
While walking around Gásadalur, my main aim was to capture the village with the mountainous backdrop—but up more closely than is normally the case. Naturally, some sheep decided they wanted to join my photo as well.
Like every village in the Faroe Islands, it’s important to be respectful when walking around; people still live here.
Dealing With the Changing Light
Dealing with the ever-changing light was a big problem on my second trip here. On my second trip here, the sun made it difficult to not blow out my highlights. The shadows were difficult to work with, too. I moved some of my photos to -1 on my camera’s exposure scale, which worked better for post-production.
I did, however, like how the sun shone directly on Gásadalur when photographing from the viewpoint. The scene had a diagonal shadow, which I worked with in Lightroom after editing.
My first trip was a lot easier in this respect. It was cloudy, for the most part, which neutralized the light. Moreover, my shadows weren’t blown out.
When visiting Gásadalur, you should also remember that the sunrise is basically a guideline. It takes a while to rise above the mountains, so even if it says 09:55 in the winter, it actually means “lol just kidding, good luck, pal”.
Another Great Viewpoint of Gásadalur and Árnafjall
As mentioned in my Faroe Islands landscape photography guide, I was able to get another unique shot of Áranafjall before we visited Gásadalur. I joined this boat tour, which was amazing for seeing Vágar from the water. While on the trip, I captured this picture of the mountain—with a customary puffin, of course.

Besides Árnafajall, the village is also visible from this angle.
Photography Equipment Recommendations for Gásadalur
Based on my two trips to Gásadalur so far, I’ve added my top recommendations for photo equipment when photographing the village.
- A Weather-Sealed Camera: Let’s be real for a second. The Faroe Islands will declare war on your camera as soon as you land, and if you aren’t prepared, you could put your camera at serious risk. I personally use the Z6 II, which I’m happy with, but most weather-sealed cameras and lenses will hold up.
- A Zoom or Wide-Angle Lens: Capturing the full mountain and waterfall scene is difficult because the spaces are tight. I either recommend taking a wide-angle lens, or—if you want some more flexibility—a zoon lens.
- A Camera Cover: If you don’t have a weather-sealed camera, I’d strongly recommend that you consider purchasing a cover for your device. Peak Design is my favorite brand.
I also put everything into a waterproof backpack to add a extra layer of protection. It didn’t rain on my second trip to Gásadalur, surprisingly, but this was still worth bringing anyway.
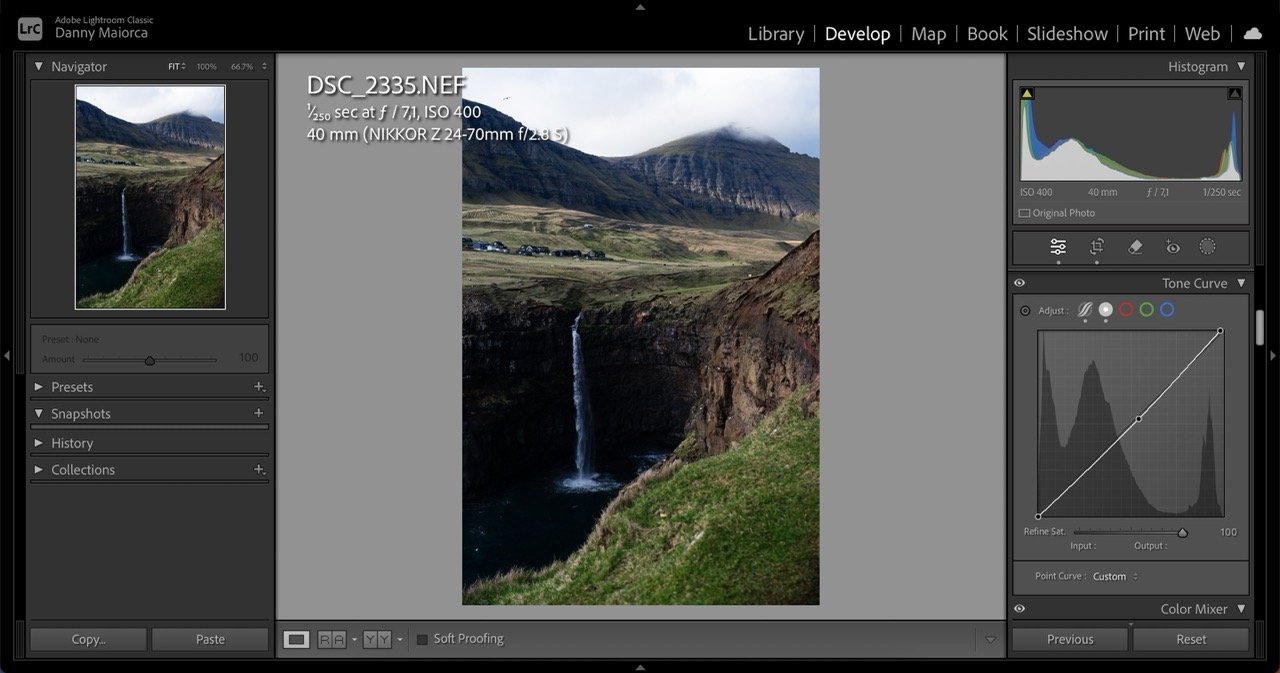
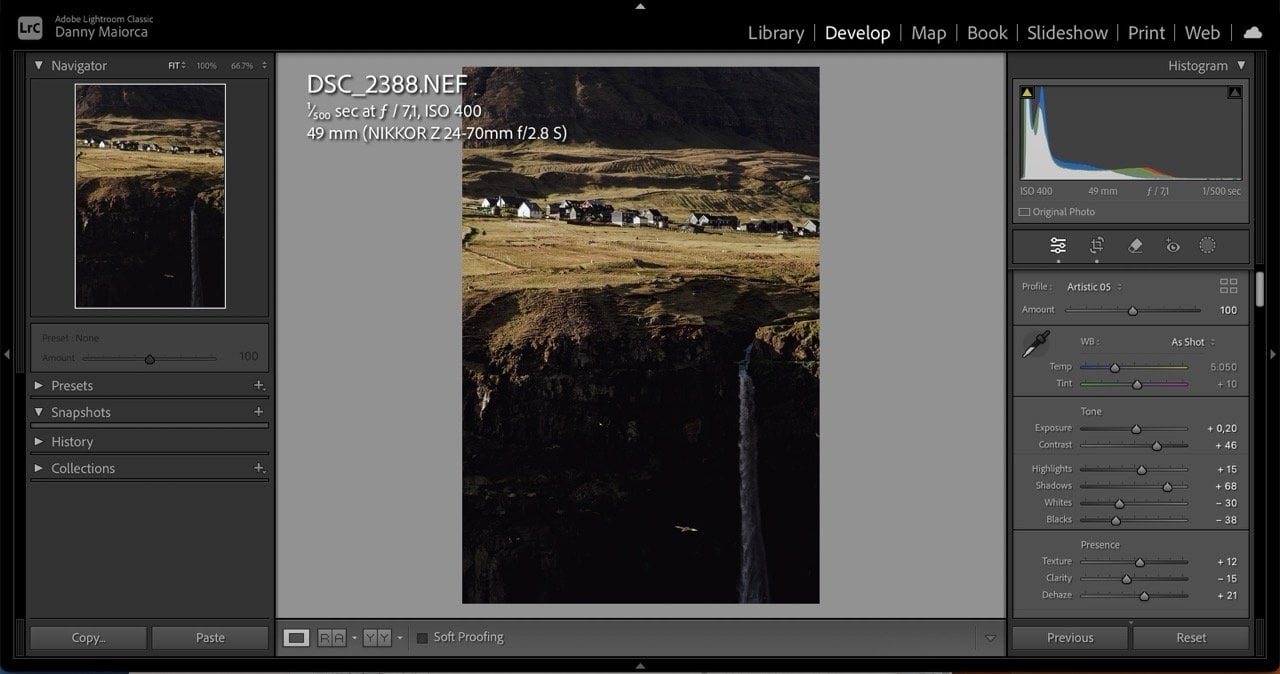
How I Edited My Gásadalur Photos
I used Lightroom and Photoshop to edit my photos after the first trip to the Faroe Islands, but to be honest, I actually think that was overkill. When I re-edited my pictures, I used just Lightroom. You can use other editing tools, but frankly, I think Lightroom is the best photo editing software bar none. I used the Tone Curve sliders, too, but didn’t really have any structured plan with this. I basically thought “vibes”.
I played around with increasing the clarity in some pictures and then decreasing it in others. In those where I decreased it, I moved the Dehaze slider to the right. With my images, I also tried different camera filters—in addition to experimenting with some of the artsy ones already in Lightroom.
You can also try playing around with film-style photography here. I did this on both trips, but much more so on the first one.
A Village Well Worth Photographing
Gásadalur might be one of the most popular villages on the Faroe Islands, but that doesn’t mean it isn’t worth visiting. The view of the houses with the mountains and Múlafossur is beautiful, and you have to see it in real life to believe it exists.
While photographing the village comes with its challenges, doing so is very much worthwhile. The viewpoint is great if you’re into birdwatching, too, and you can get a fantastic view from the water if you book a boat tour.
Now that you’ve read this guide, you should be better prepared for your photography adventure.


